Fix Grout in 30 Minutes: Tile and Grout Cleaning for Homeowners
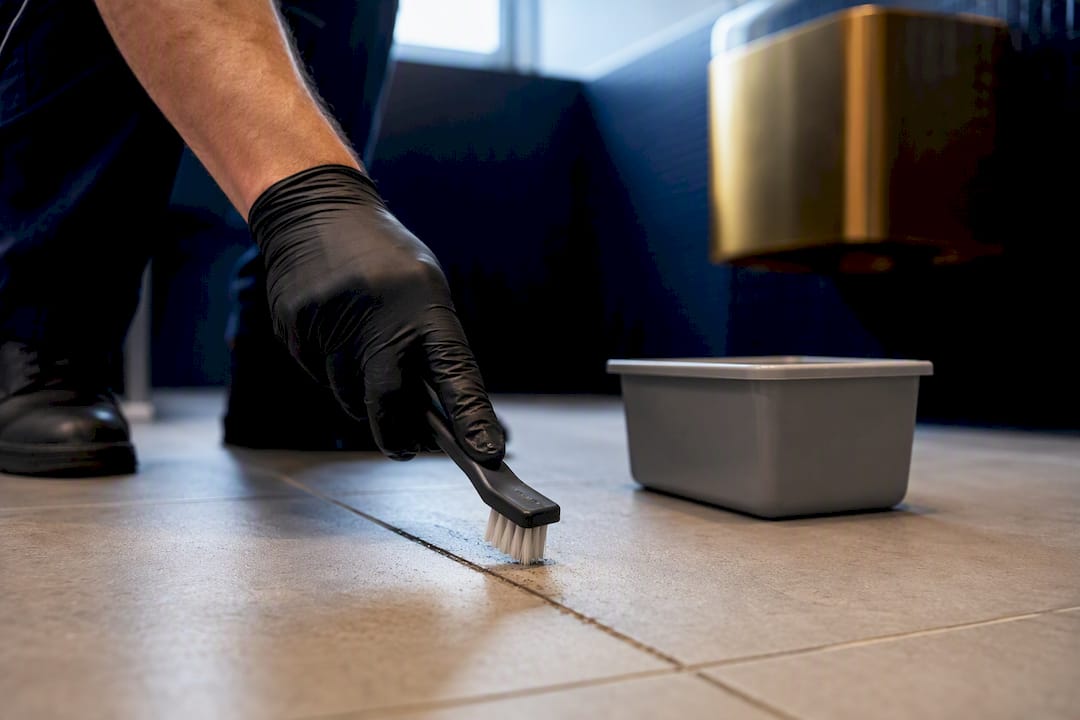
For most everyday grime, an oxygen-bleach soak or a baking-soda-and-hydrogen-peroxide paste will pull grout back to near-original color within 30 minutes of dwell time. Efflorescence, cracked or crumbling grout, recurring mold, or larger jobs or extensive areas call for professional steam extraction or regrouting instead. Either way, seal the grout afterward. The Tile Council of North America and companies like Nationwidemaintenance both treat sealing as the step that actually prevents the next deep clean.
TL;DR:
- DIY methods like baking soda paste and oxygen bleach are effective for most surface stains and light grime, with dwell times ranging from 10 to 30 minutes.
- Heavy staining, efflorescence, and crumbling grout require professional steam extraction, regrouting, or sealing to address root problems and prevent recurrence.
- Proper preparation, including sweeping and spot-testing, enhances cleaning results, while tools like nylon brushes and shop-vacs ensure effectiveness and safety.
- Sealing grout every 6 to 12 months significantly reduces the need for deep cleaning, especially in high-moisture areas, and can be tested with water droplet tests.
- Complex issues like efflorescence, recurring mold, or large-scale projects benefit from professional equipment and expertise, with costs depending on size and scope.
Table of Contents
- DIY Tile and Grout Cleaning vs. Professional Services
- How Do You Clean Tile and Grout Step by Step?
- What Tools and Cleaners Should You Use?
- Do You Need to Seal Grout, and How Often?
- When Should You Hire a Professional Tile and Grout Cleaner?
- What Does Professional Tile and Grout Cleaning Cost?
- Why Most Grout Advice Skips the Real Decision Point
- Let Nationwidemaintenance Handle the Tile Your Weekend Can’t Fix
- Sources
DIY Tile and Grout Cleaning vs. Professional Services
Most homeowners default to whichever method they’ve heard of first, which is usually the wrong way to pick. The better question is what you’re actually dealing with: light surface soil, years of embedded grime, or a structural grout problem that no cleaner will fix.
DIY methods handle the majority of routine tile and grout maintenance well:
- Baking soda + hydrogen peroxide paste works best on light-to-moderate discoloration and everyday kitchen or bathroom grime.
- Oxygen bleach soak (sodium percarbonate dissolved in hot water) handles deeper, older staining without the harsh fumes of chlorine.
- Steam cleaning loosens grease and grime in high-traffic areas and works well on both grout lines and tile surfaces without added chemicals.
Professional methods exist for a reason. They handle what a mop and a scrub brush can’t:
- Hot-water extraction flushes dissolved dirt out of porous grout instead of just pushing it around.
- Industrial steam plus high-suction extraction pulls embedded contaminants from grout that’s absorbed years of foot traffic and spills.
- Grout color sealing restores uniform color and adds a protective layer in one pass.
- Regrouting replaces grout that’s cracked, crumbling, or too stained to save.
Before picking a route, run through a short checklist: How large is the area? Is the stain surface-level or soaked into the grout body? Is the substrate (natural stone, unglazed tile, cementitious grout) sensitive to certain chemicals? How much time do you actually have, and do you need the fix to last years, not weeks? A grout pen might look fine for a weekend fix, but as The Spruce notes, it’s a shorter-lived solution than professional color sealing, which holds up far longer under regular cleaning and traffic.
How Do You Clean Tile and Grout Step by Step?
Start with prep, not product. Sweep or vacuum loose debris first. Skipping this turns your cleaning session into an abrasive-paste workout, because grit gets ground into the grout instead of lifted off it. Protect nearby wood trim or cabinetry with a towel, open a window or run a fan for ventilation, and spot-test any cleaner on a hidden tile or grout line before going all in. Rubber gloves and eye protection matter more than people think, especially with oxygen bleach or steam.
Here’s the process broken into stages:
- Mix and apply. For the baking-soda-and-peroxide method, combine baking soda with 3% hydrogen peroxide into a spreadable paste and work it into the grout lines with a stiff nylon brush.
- Dwell. Let it sit 10 to 15 minutes for light stains, up to 30 minutes for heavier grime. Cleaning experts at Good Housekeeping stress keeping the surface moist during this window. A cleaner that dries out mid-process loses most of its lifting power, so mist it again if it looks chalky before the time is up.
- Agitate correctly. Scrub in short strokes that pull grime up and out of the grout line rather than back-and-forth motions that just redistribute it.
- Rinse thoroughly. Use clean water and a microfiber mop, then go over the area with a wet/dry shop-vac to pull up dirty residue instead of letting it dry back onto the tile.
- For oxygen bleach, dissolve sodium percarbonate in hot water per the package ratio, pour over grout lines, let sit the same 10 to 30 minute range, then scrub and rinse the same way.
- For steam cleaning, work in small sections, let the steam dwell 20 to 30 seconds per pass, then immediately wipe or extract the loosened grime before it resettles.
Pro Tip: Keep a spray bottle of plain water on hand during any dwell-time method. A 10 second re-mist halfway through the wait keeps the cleaner active instead of letting it crust over, which is one of the most common reasons DIY grout cleaning “doesn’t work.”
If none of that touches the stain, move up the ladder carefully. A stronger, targeted commercial grout cleaner is next, followed by professional steam extraction. Regrouting is the last resort, not the first move. Acids can dissolve the cement binder in grout with repeated use, according to TCNA, so reserve them for controlled, professional application rather than a bottle from under the sink. Rushing to regrout when a proper soak-and-scrub would’ve worked wastes money and disturbs tile that didn’t need touching.
What Tools and Cleaners Should You Use?
The right tool matters as much as the right chemical. A stiff nylon grout brush handles most agitation jobs without scratching anything. For actual grout removal ahead of regrouting, an oscillating multitool fitted with a carbide-grit blade gives you control and keeps dust down, a method Popular Mechanics recommends over hand-scraping. Round out the kit with a shop-vac for extraction and microfiber mops for final rinsing and drying.
On the cleaner side:
- Oxygen bleach (sodium percarbonate) is a strong middle ground: gentler than chlorine, more effective on deep grime than vinegar.
- pH-neutral cleaners are the safest daily-use option for glazed tile and sealed grout.
- Enzyme cleaners work well on organic stains like food grease or pet accidents.
- Commercial grout cleaners make sense for one-time deep cleans when you don’t want to mix your own solution.
Now the warnings, because this is where most damage happens. Skip oil- or wax-based soaps, which leave a film that actually attracts more dirt over time. Don’t rely on repeated vinegar applications on cementitious grout. Experts warn that its acidity breaks down the cement binder with regular use, and metal scrapers or wire brushes scratch tile glaze and widen grout pores, giving future dirt more surface area to grip. Go easy on chlorine and strong acids generally.
Grout is more porous than most people assume, which is exactly why stains seem to “come back” even after a good scrub. TCNA’s own guidance points to sealing as the fix that actually addresses the porosity problem instead of just treating the symptom over and over.
Do You Need to Seal Grout, and How Often?
Sealing is the difference between cleaning tile once a season and cleaning it every few weeks. There are two main types: penetrating sealers, which soak into cementitious grout and repel moisture and stains from within, and topical sealers, which sit on the surface and offer a visible sheen but wear faster underfoot.
Reapply penetrating sealer every 6 to 12 months in bathrooms, kitchens, and other high-moisture or high-traffic areas. Cementitious grout and unglazed tile both need sealing. Epoxy grout and fully glazed tile generally don’t, since they’re not porous enough to absorb stains in the first place.
Between sealing cycles, a short routine keeps grout from backsliding:
- Squeegee shower walls and floors after each use to cut standing moisture.
- Wipe up spills immediately instead of letting them sit and soak in.
- Swap your mop water (or the mop head) regularly, since a dirty mop just redeposits grime into clean grout lines.
- Vacuum tile floors weekly to keep grit from grinding into the grout under foot traffic.
Pro Tip: Test whether your grout needs resealing by dripping a few drops of water onto it. If it beads up, the seal is still working. If it soaks in within a minute, it’s time to reseal.
When Should You Hire a Professional Tile and Grout Cleaner?
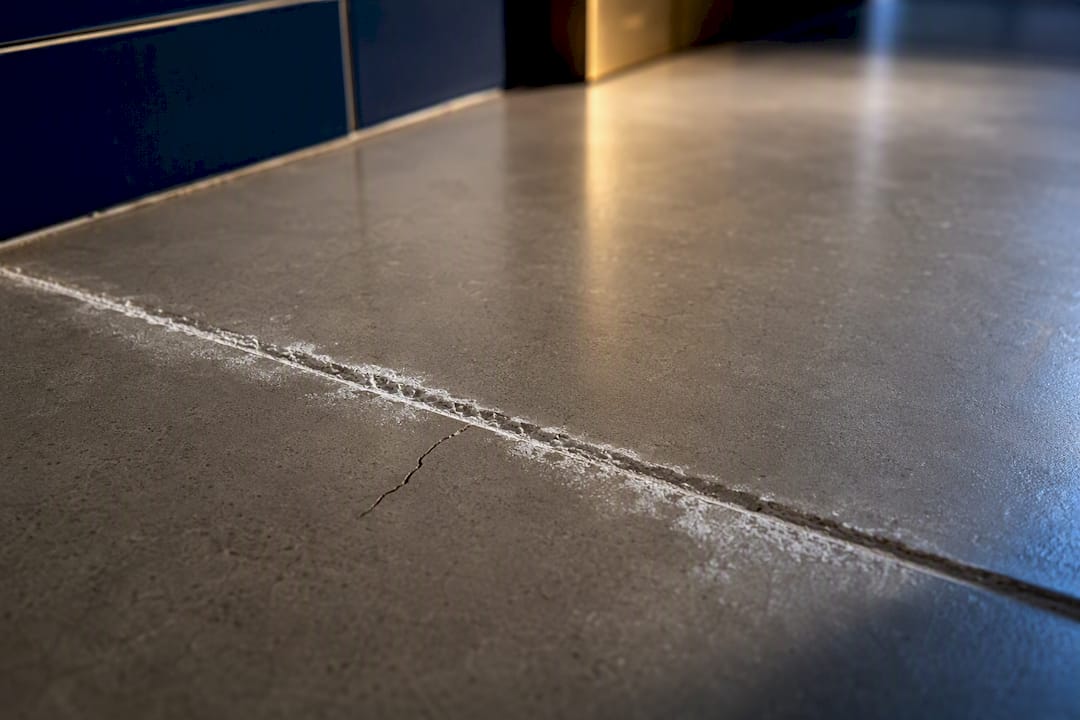
Some situations aren’t DIY problems, no matter how good your technique is. Efflorescence (that chalky white mineral bloom on grout or stone) usually signals moisture moving through the substrate, not just surface dirt, and needs professional diagnosis. Structural grout failure, cracking, or crumbling means cleaning products won’t fix anything; only mechanical removal and regrouting will. Anything over roughly 300 square feet or spanning multiple rooms usually isn’t worth the labor and equipment cost of doing it yourself. Mold that keeps returning after proper cleaning, or natural stone with contaminants worked deep into hard-to-reach areas, both call for professional-grade extraction.
What separates professional work from a home job isn’t effort, it’s equipment. Pros bring industrial steam or hot-water extraction with high-suction recovery that pulls dissolved grime completely out of the grout instead of leaving it to dry back in. They apply color sealing evenly and use controlled acid treatments only where appropriate, something TCNA flags as a risk in untrained hands. Regrouting work includes tile protection to prevent collateral damage.
If you’re vetting a vendor, ask direct questions before signing anything:
- What cleaning method and equipment will you use on this specific tile and grout type?
- Can you show insurance and licensing documentation?
- Do you have before-and-after photos from comparable jobs?
- What sealer brand do you use, and what’s the cure time before the floor can be walked on?
- Will I get a written scope of work before you start?
Nationwidemaintenance’s interior floor care services are built around answering exactly these questions for facility managers who can’t afford vague answers or guesswork on a commercial floor.
What Does Professional Tile and Grout Cleaning Cost?
DIY costs stay low: expect $15 to $40 in cleaning products, plus $30 to $80 a day if you rent a steam cleaner or extraction unit. Professional pricing runs in a per-square-foot range that climbs with travel distance, heavy pre-cleaning prep, regrouting needs, and sealing add-ons.
Timeline depends heavily on scope:
- A small bathroom typically takes 30 to 60 minutes.
- An average kitchen or living area runs 1 to 3 hours.
- Larger multi-room jobs stretch across a full day or more.
- Sealer cure time adds 24 to 72 hours before the floor sees regular foot traffic again.
Why Most Grout Advice Skips the Real Decision Point
Most tile-cleaning content treats every stain the same: apply cleaner, scrub, done. That’s backwards. The real decision isn’t which recipe to use, it’s whether you’re looking at a cleaning problem or a structural one, and too many homeowners waste a weekend scrubbing at grout that actually needed to be replaced.
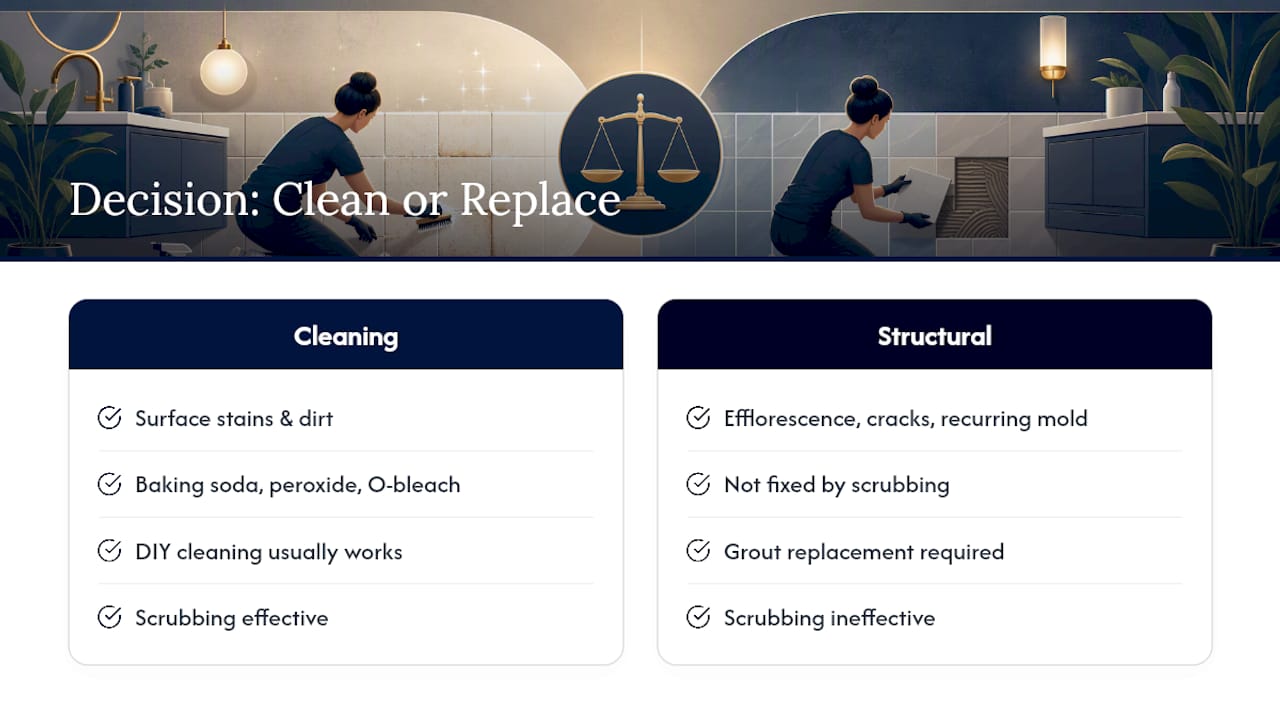
The DIY methods in this guide genuinely work for the vast majority of tile and grout situations. Baking soda and peroxide, oxygen bleach, correct dwell time and rinsing will resolve most staining without spending a dollar on a service call. Where the conventional advice falls short is in pretending that persistence with a scrub brush can fix efflorescence, cracked grout, or mold that keeps returning. It can’t. Those are substrate problems, and no amount of elbow grease changes that.
Prioritize diagnosis before method. Look at what you’re actually dealing with, match it to the right approach, and seal the result so you’re not repeating the whole process every three months. That’s the habit that separates tile that looks good for years from tile you’re constantly fighting with.
— Nationwide Maintenance.
Let Nationwidemaintenance Handle the Tile Your Weekend Can’t Fix
When a stain has soaked past what a soft-bristle brush and patience can pull out, or when the job spans a lobby, break room, or an entire multi-location retail chain, Nationwidemaintenance steps in with the same industrial steam extraction and regrouting expertise built over 30 years of servicing commercial, retail, and healthcare facilities.

This isn’t a service built for a single bathroom floor. It’s built for facility managers and property teams who need consistent, documented results across dozens of locations without juggling separate vendors for cleaning, sealing, and repair. Nationwidemaintenance’s interior floor care and tile cleaning services cover everything from routine maintenance cleaning to full grout restoration, backed by the same eco-conscious methods and 24/7 emergency response the company brings to clients like Costco and CVS. If your property’s tile and grout has moved past the DIY stage, or you manage enough square footage that a one-off cleaning crew isn’t cutting it, request a facility maintenance consultation and get a written scope before the next deep clean is due.
Sources
- Cleaning Grout | Tile Council of North America
- How to Clean and Restore Tile Grout So It Looks Brand New Again
- How to Clean Grout, According to Cleaning Experts
- Easy Steps To Clean and Restore Tile Grout
Recommended
Need this handled at your facility?
Our crews cover commercial properties across New York, New Jersey, and Connecticut.