Parking Lot Striping Standards: A Property Manager’s Guide
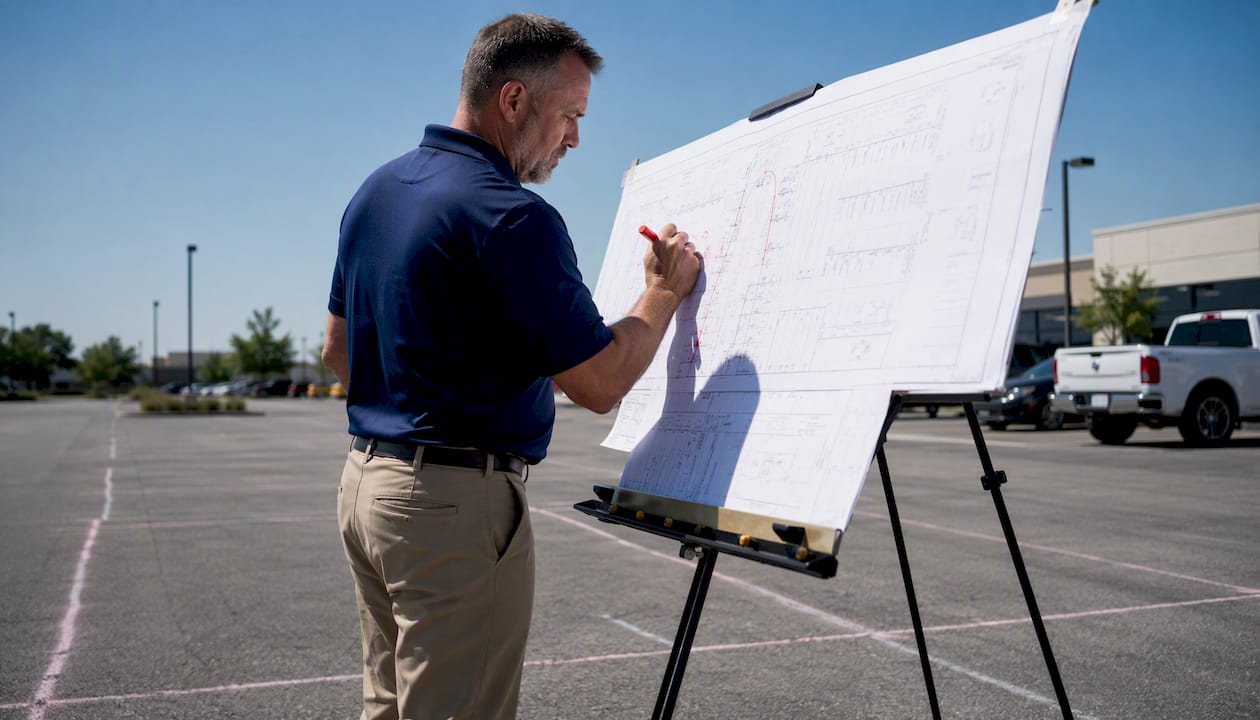
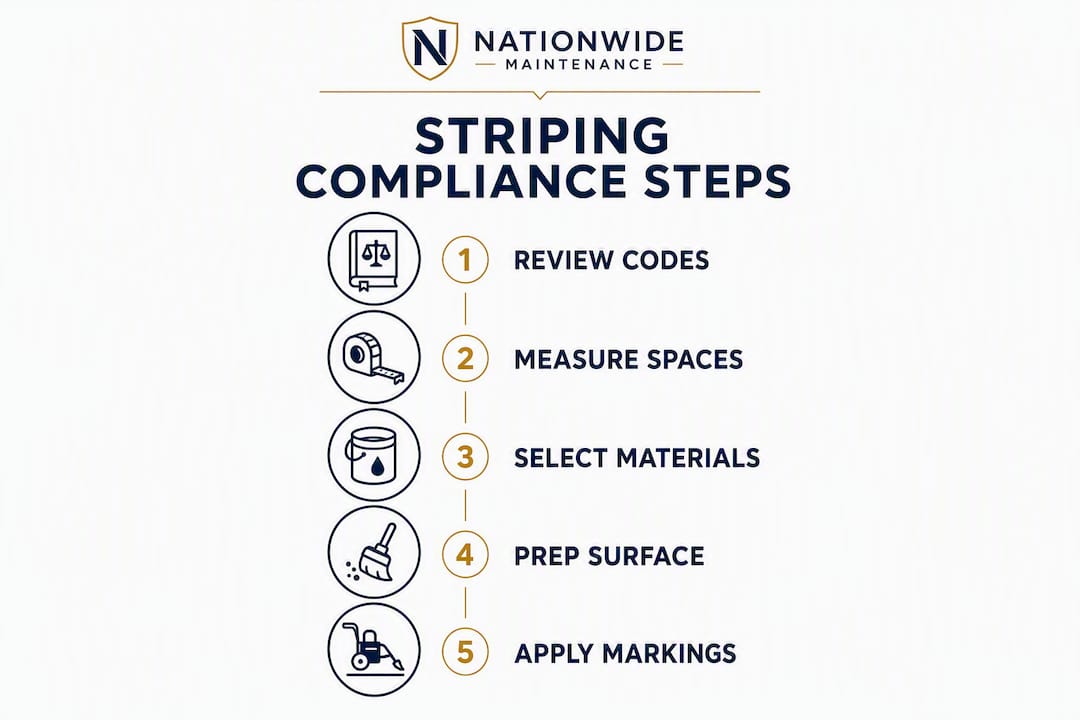
Two federal frameworks govern parking lot striping standards in the United States: the 2010 ADA Standards (enforced by the Department of Justice) and the FHWA Manual on Uniform Traffic Control Devices (MUTCD), which sets color conventions and marking types. Your local Authority Having Jurisdiction (AHJ) — typically the fire marshal, building department, or municipal engineer — can layer stricter requirements on top of both. Before any contractor touches your pavement, take these steps:
- Audit accessible-space counts against ADA minimums for each parking facility (not the whole site).
- Measure critical widths: stall width, access aisle, drive lanes, and fire lanes.
- Confirm color and curb-paint rules with your AHJ — MUTCD is national guidance, not a local mandate.
- Schedule sealcoating or blackout of old lines at least 48 hours before new striping goes down.
- Document everything — photos, AHJ email confirmations, and permit copies belong in your procurement file.
Pro Tip: If your lot was last striped more than five years ago, assume it needs a full ADA recount. Restriping triggers continuing ADA obligations regardless of what the previous contractor certified.
Noncompliant accessible spaces, blocked access aisles, and incorrect fire-lane markings are not just code violations. They create legal exposure under the ADA and life-safety risk for emergency responders.
Table of Contents
- Which official U.S. standards govern parking lot striping?
- What are the standard parking stall dimensions you need to know?
- What do MUTCD and local codes say about colors and line widths?
- How do you choose the right paint and marking materials?
- How should you design traffic flow, arrows, and crosswalks?
- ADA compliance checklist for accessible parking spaces
- What surface prep and application conditions produce lasting markings?
- How often should you re-stripe, and what does it cost to plan for?
- What are the most common striping mistakes and how do you prevent them?
- How do you calculate linear feet and paint quantity for a bid?
- Key Takeaways
- What the industry gets wrong about parking lot striping
- Nationwidemaintenance handles striping, prep, and repairs under one contract
- Useful sources for further reading
Which official U.S. standards govern parking lot striping?
Three layers of authority control parking lot marking guidelines in the U.S. Most managers know about ADA, fewer know about MUTCD, and almost nobody reads their municipal code until there’s a problem.

| Source | What It Controls | Where to Find It |
|---|---|---|
| 2010 ADA Standards (ADA.gov) | Accessible space counts, stall and aisle dimensions, signage, slopes, accessible routes | ada.gov/topics/parking |
| ADA Restriping Brief (ADA.gov) | Obligations triggered by restriping; per-facility count rules; van-accessible frequency | ada.gov/resources/restriping-parking-spaces |
| FHWA MUTCD (11th Edition) | Color conventions, marking types, retroreflectivity, line widths | mutcd.fhwa.dot.gov |
| Local AHJ (fire, building, municipal engineer) | Fire-lane widths, curb-paint colors, permit requirements, concrete vs. asphalt color rules | Your city/county code |
The ADA Restriping Brief is the document most managers overlook. It clarifies that restriping — even a simple refresh — triggers the obligation to provide accessible spaces per current ADA minimums, calculated per individual parking facility. You cannot average counts across a campus or a multi-building site.
Municipal codes often restate MUTCD conventions and add local specifics: which colors are allowed on concrete versus asphalt, curb-paint policies, and whether fire-lane text must say “FIRE LANE” or “NO PARKING FIRE LANE.” The City of Chattanooga’s parking lot standards are a useful example of how a municipality layers local requirements on top of MUTCD while still referencing it as the baseline. Your AHJ may do the same — or may have written something entirely different.
What are the standard parking stall dimensions you need to know?
Stall dimensions vary by jurisdiction, but the targets below reflect common U.S. practice and give contractors a working baseline. Always verify with your AHJ before finalizing a layout plan.
Standard and compact stalls
A standard stall is typically approximately 9 feet wide by 18 feet deep for 90-degree parking. Some municipalities allow smaller compact stalls but only where signage designates them as compact. Mixing compact and standard stalls without clear signage is a common source of complaints and minor accidents.
Accessible and van-accessible spaces
Per the 2010 ADA Standards, a standard accessible car space must be at least 96 inches (8 feet) wide, with an adjacent access aisle at least 60 inches (5 feet) wide. Van-accessible spaces have two compliant configurations:
- Option 1: 132-inch-wide space with a 60-inch access aisle.
- Option 2: 96-inch-wide space with a 96-inch access aisle on the passenger side.
- Vertical clearance: At least 98 inches for van-accessible spaces and along the entire accessible route to the entrance.
Access aisles must be marked to discourage parking in them and must be level — slopes exceeding 1:48 in any direction are a common compliance failure.
Aisle widths and angle layouts
Two-way drive aisles for 90-degree stalls are generally around 24 feet wide, while one-way aisles serving angled stalls can be narrower, typically ranging from about 12 to 18 feet, enabling denser layouts. The tradeoff: angled lots require one-way traffic flow, which means more signage and driver confusion if not clearly marked.
Pro Tip: Before finalizing any layout, run a turning-template check for the largest vehicle type that regularly uses your lot — delivery trucks and accessible vans have very different swept paths than passenger cars.
What do MUTCD and local codes say about colors and line widths?
Color is where managers most often get surprised by local rules. The MUTCD provides national guidance, but it does not preempt local AHJ requirements.
| Color | MUTCD Convention | Common Local Variation |
|---|---|---|
| White | Parking stalls, lane lines, crosswalks | Consistent across most jurisdictions |
| Yellow | Separation lines, caution, no-parking curbs | Some jurisdictions use yellow for fire lanes |
| Blue | Supplement to white for accessible spaces | Required by many municipalities; ADA does not mandate a color |
| Red | Fire lanes, curb paint in many jurisdictions | Varies — confirm with fire marshal |
The MUTCD 11th Edition specifies that blue markings shall supplement white markings for accessible parking spaces. That word “supplement” matters: blue does not replace white stall lines, it adds to them. Some jurisdictions go further and require blue curb paint or blue-painted access aisles. Check before you spec.
Line widths run 4 inches for standard stall lines in most commercial applications. Some agencies allow or require 4–6 inches for higher-visibility applications, particularly in high-pedestrian or senior-care facilities. Fire-lane lines and curb markings often require wider strokes — your AHJ will specify.
Fire lanes and curb marking are the most locally variable element. Minimum clear widths for fire apparatus access are typically set by the fire marshal and often run 20 feet or more, but this varies. The required wording (“FIRE LANE,” “NO PARKING FIRE LANE,” or a specific local phrase) and curb color (red in most jurisdictions, yellow in others) must be confirmed before painting.
Signage integration: Accessible parking signs should be mounted at a height that ensures visibility and compliance, typically around 60 inches above the ground to the bottom of the sign. Van-accessible spaces require an additional “Van Accessible” placard or sign. Both must display the International Symbol of Accessibility. Signs that are present but mounted too low, or that use outdated symbols, are a compliance failure just as much as a missing sign.
How do you choose the right paint and marking materials?
Material selection is where contractors often underbid and property managers often overpay for the wrong product. The right choice depends on climate, traffic load, and what your AHJ or state DOT spec requires.
Material families
- Waterborne acrylic: The standard for most commercial lots. Good durability, environmentally compliant, and widely available. Best applied above 50°F with low humidity.
- Thermoplastic: Applied hot, bonds to asphalt or concrete, and lasts significantly longer than waterborne acrylic in high-traffic conditions. Higher upfront cost, but lower lifecycle cost on busy lots.
- Epoxy: Two-component system with excellent adhesion and chemical resistance. Common in parking garages and industrial facilities.
- Methacrylate (MMA): Cures at temperatures as low as 14°F, making it the go-to for cold-weather applications where waterborne paints cannot cure reliably. Higher cost, but the only practical option for late-fall or early-spring striping in northern climates.
- Multi-component liquid systems: Required by some state DOTs for specific applications. Iowa DOT specifications, for example, set minimum retroreflectivity values and wet-film thickness requirements for multi-component materials, along with limits on toxic heavy metals.
Per WBDG guidance on painted pavement markings, high-performance waterborne acrylic is the commercial standard, while methacrylate systems are reserved for cold-weather conditions where waterborne products cannot cure.
Glass beads and retroreflectivity
Glass beads dropped into wet paint are what make lines visible at night. Per the Louisiana DOTD Pavement Marking Manual, bead timing is critical: apply while the paint is wet but curing, so beads sink to the correct depth and bond properly. Beads applied too late sit on the surface and shed quickly. Retroreflectometer readings after cure are the only reliable QA check.
Material selection checklist for bidders
- Specify minimum wet-film thickness (WFT) in mils, not just “two coats.”
- Require retroreflectivity minimums (in mcd/m²/lux) appropriate to your traffic volume.
- State environmental restrictions (VOC limits, heavy-metal prohibitions).
- Confirm cure time requirements before the lot reopens to traffic.
- Require proof of equipment calibration for bead drop rate.
Pro Tip: Specify performance metrics rather than brand names. A retroreflectivity minimum and a WFT target will get you equivalent bids from multiple qualified contractors — a brand name just locks you into one supplier’s pricing.
How should you design traffic flow, arrows, and crosswalks?
A parking lot layout is a traffic system. Faded or absent directional markings cause driver hesitation, near-misses, and pedestrian conflicts — particularly near loading zones and building entrances.

Angled one-way layouts work well for high-turnover retail where quick in-and-out movement matters. Ninety-degree two-way layouts suit lower-turnover facilities like office parks or medical campuses, where drivers spend more time maneuvering and two-way flow reduces the need for additional signage. The TrafficSafetyStore guide to parking lot striping makes the point clearly: a copy-paste layout typically fails because successful designs maximize usable stalls while complying with the most restrictive applicable code — fire, ADA, and local ordinances simultaneously.
Key markings to include in every layout:
- Entrance and exit arrows at every drive aisle entry point.
- Stop bars at pedestrian crossings and at lot exits before the public right-of-way.
- Crosswalk markings (typically two parallel white lines, 6 inches wide, 6 feet apart) connecting accessible spaces to accessible building entrances.
- Loading zone delineation with curb paint and pavement text where delivery vehicles stage.
- Pedestrian path markings where foot traffic crosses drive aisles.
Pro Tip: Walk the lot at night before finalizing your layout plan. Sight-line problems and poorly lit crossing points are invisible during a daytime walkthrough but obvious after dark. Coordinate exterior maintenance scheduling so lighting upgrades and striping happen in the same mobilization.
ADA compliance checklist for accessible parking spaces
Restriping triggers ADA obligations. Here is what a compliance walkthrough covers, drawn from the ADA Restriping Brief and the 2010 ADA Standards.
Minimum accessible space counts per parking facility
| Total Spaces in Facility | Minimum Accessible Spaces | Van-Accessible (1 of 6) |
|---|---|---|
| — | 1 | 1 |
| — | 2 | 1 |
| — | 3 | 1 |
| — | 4 | 1 |
| — | 5 | 1 |
| — | 6 | 1 |
| — | — | 2 |
| — | 8 | 2 |
| — | 9 | 2 |
Counts are calculated per individual parking facility, not across an entire site with multiple lots. A campus with three separate lots calculates minimums three times.
On-site compliance checklist
- Confirm space count meets ADA minimums for this facility.
- Measure stall width: 96 inches minimum for car spaces, 132 inches (or 96" + 96" aisle) for van-accessible.
- Measure access aisle width: 60 inches minimum for car spaces, 96 inches for van-accessible.
- Verify access aisle slope does not exceed 1:48 in any direction.
- Check vertical clearance on van-accessible route: 98 inches minimum.
- Confirm sign mounting height: bottom of sign at least 60 inches above the parking surface.
- Verify van-accessible signage is present and displays the International Symbol of Accessibility.
- Confirm accessible spaces are on the shortest accessible route to an accessible entrance.
- Check that access aisles are not blocked by wheel stops, vegetation, or stored equipment.
- Photograph every accessible space and aisle for your compliance records.
Location matters as much as count. Accessible spaces must be dispersed near each accessible entrance on multi-entrance sites, not clustered at one end of the lot because it was convenient for the contractor.
What surface prep and application conditions produce lasting markings?
Poor prep is the single biggest cause of early striping failure. Paint applied to a dirty, oily, or damp surface will peel within months regardless of material quality.
| Condition | Minimum Requirement | Notes |
|---|---|---|
| Pavement temperature | At least 40°F and rising | Do not stripe on a falling temperature — moisture condenses as pavement cools |
| Ambient humidity | Below 85% relative humidity | High humidity extends cure time and reduces adhesion |
| Surface moisture | Completely dry | No striping after rain until surface is visually and tactilely dry |
| Surface cleanliness | Free of oil, debris, curing compounds | Air blast immediately before application |
| Post-sealcoat cure | 48 hours minimum | New sealcoat or black latex bleed-through ruins new lines |
Per industry application practice, pavement temperature must be at least 40°F and rising at the time of application, and surfaces must be clean, dry, and free of oil or curing compounds. Contractors should use an air blast immediately before striping for best adhesion.
Removing old markings
When ghost lines would show through new paint, the options are vacuum blasting, grinding, or sealcoating with a high-opacity black latex to cover old lines completely. The 48-hour cure window after blacking out is non-negotiable — new paint applied over uncured sealcoat will blister and peel.
Pro Tip: Require contractors to submit a written surface-prep plan before mobilization. If the plan does not specify how old lines will be addressed and what the minimum cure time is after any sealcoat, the spec is incomplete.
How often should you re-stripe, and what does it cost to plan for?
Lifespan varies significantly by material, traffic volume, climate, and whether snowplows run over the lot in winter.
| Material | Typical Lifespan | Key Lifespan Reducers |
|---|---|---|
| Waterborne acrylic | 1–3 years | High traffic, snowplow abrasion, UV exposure |
| Thermoplastic | 3–— years | Snowplow abrasion, freeze-thaw cycling |
| Epoxy (two-component) | 3–5 years | Chemical spills, heavy truck traffic |
| Methacrylate (MMA) | 3–6 years | UV degradation in high-sun climates |
Restriping triggers
- Lines are faded to the point where drivers hesitate or stall counts are unclear.
- Retroreflectivity readings fall below your specified minimum.
- ADA space counts or dimensions no longer meet current standards.
- Major pavement repairs or sealcoating has been completed.
- A regulatory re-evaluation (new fire code, updated ADA guidance) changes requirements.
Simple budgeting approach
Measure total linear feet of striping (stall lines, arrows, legends, fire-lane text). Multiply by your material’s unit cost per linear foot, then add a labor multiplier and a contingency for surface prep. Traffic control — cones, flaggers, temporary signage — adds cost that low bidders often omit. Require it to be line-itemed in every bid so you can compare apples to apples.
Specify performance metrics in procurement documents rather than brand names. A retroreflectivity minimum, a WFT target, and a bead-application spec will produce competitive bids from qualified contractors without locking you into a single supplier.
What are the most common striping mistakes and how do you prevent them?
Most striping failures are predictable. They show up in the same places on every lot.
- Incorrect accessible-space counts — Calculating counts across a whole site instead of per facility is the most common ADA error on multi-lot properties.
Red flags on inspection: ragged line edges, paint peeling in high-traffic wheel paths, retroreflectivity that looks dull at night, and drainage channels clogged near access routes. Require contractors to address all of these before final payment.
How do you calculate linear feet and paint quantity for a bid?
A quantity takeoff does not require specialized software. A tape measure, a site plan, and simple arithmetic get you there.
Step 1: Map the lot into fields. Divide the lot into sections by stall type (standard, accessible, angled) and record the stall count and average stall depth for each field.
Step 2: Calculate linear feet per field. For a field of 90-degree stalls, each stall requires two side lines and one back line. A standard 9’ x 18’ stall generates roughly 45 linear feet of line (two 18-foot sides plus one 9-foot back line). Multiply by stall count.
Step 3: Add arrows, legends, and special markings. Count directional arrows, stop bars, crosswalk segments, “FIRE LANE” text, and accessible-space stencils separately. Each arrow typically runs 6–8 linear feet equivalent; each crosswalk segment adds 6-foot-wide parallel lines across the drive aisle width.
Step 4: Convert to paint volume. Use the manufacturer’s coverage rate (typically expressed in square feet per gallon at a specified WFT). Divide total square footage of paint film by coverage rate, then add 10–15% waste factor.
| Sample Field | Stall Count | Linear Feet per Stall | Total Linear Feet |
|---|---|---|---|
| Standard 90° stalls | 40 | 45 ft | — |
| Accessible spaces (incl. aisle lines) | 4 | 90 ft | — |
| Total | 2,— |
At a 4-inch line width, 2,360 linear feet equals roughly 785 square feet of paint film. At a typical coverage rate, that translates to approximately 2–3 gallons of waterborne acrylic at standard WFT — before bead usage and waste factor. Always request the manufacturer’s technical data sheet and calculate from the actual specified WFT, not a rule of thumb.
Procurement checklist for bids
- Existing-condition photos of every accessible space and fire lane.
- Required material specs: WFT, retroreflectivity minimum, VOC limit, bead application rate.
- Traffic control plan (cones, signage, phasing).
- Cure time constraints before lot reopens.
- QA acceptance criteria: retroreflectometer readings, line-edge tolerance.
Key Takeaways
Compliant, durable parking lot striping requires coordinating ADA minimums, MUTCD color conventions, and local AHJ rules before a single gallon of paint is ordered.
| Point | Details |
|---|---|
| ADA counts per facility | Calculate minimum accessible spaces per individual parking facility, not across the whole site. |
| Restriping triggers ADA obligations | Any restriping project requires meeting current 2010 ADA Standards, including van-accessible frequency (1 of every 6 accessible spaces). |
| Surface prep determines lifespan | Apply only when pavement is at least 40°F and rising; allow 48 hours after sealcoat before striping. |
| Specify performance, not brands | Require retroreflectivity minimums, WFT targets, and bead-application specs in every bid document. |
| Nationwidemaintenance bundles prep and striping | Nationwidemaintenance integrates sealcoating, repair, and line striping under one contract for NY, NJ, and CT properties, reducing rework and lifecycle cost. |
What the industry gets wrong about parking lot striping
Most property managers treat striping as a commodity — lowest bid wins, done. That framing is what produces lots that need restriping every 18 months and accessible-space violations that show up in DOJ complaints.
The real problem is sequencing. Striping is the last step in a chain that starts with pavement condition, runs through surface prep, and ends with QA. When a contractor skips the blackout step to save half a day, or applies paint at 38°F because the schedule says today is the day, the failure is baked in before the first line is drawn. You will not see it for three months. By then, the contractor is long gone and the warranty argument is yours to make.
The other thing managers consistently underestimate is the ADA per-facility calculation. A property with two separate parking areas — say, a front lot and a rear employee lot — must calculate accessible-space minimums twice. Combining them into one count is wrong, and it is the kind of wrong that surfaces during a complaint investigation, not a routine inspection.
Seasonal scheduling matters more than most managers realize. In the Northeast and Midwest, the window for waterborne acrylic is roughly May through October, with some margin on either end depending on overnight temperatures. Booking striping in late September sounds fine until a cold snap pushes pavement temperatures below 40°F the night before the crew arrives. Build a weather contingency into every contract, and consider thermoplastic or MMA systems if your facility cannot afford a weather delay.
Finally: require a retroreflectometer reading at acceptance. It takes 15 minutes and gives you a documented baseline for the next inspection cycle. Contractors who object to that requirement are telling you something important about the quality of their bead application.
Nationwidemaintenance handles striping, prep, and repairs under one contract
Coordinating a separate sealcoating contractor, a striping crew, and an asphalt repair company for a single parking lot refresh is where projects fall apart. Scheduling gaps, finger-pointing over surface prep quality, and mismatched cure-time windows are the predictable result.
Nationwidemaintenance eliminates that friction for commercial properties in New York, New Jersey, and Connecticut. The company’s parking lot services bundle line striping and painting, asphalt sealcoating, pothole repair, and parking lot cleaning under a single contract with a single point of accountability. Surface prep, cure windows, and QA inspections are sequenced correctly because one team owns the whole scope. For property managers overseeing multiple locations, Nationwidemaintenance also offers integrated facility maintenance contracts that cover recurring striping cycles alongside seasonal grounds maintenance and emergency response. Request an estimate for your NY, NJ, or CT property and get a scope that includes existing-condition documentation and ADA space verification from the first site visit.
Useful sources for further reading
Use these resources to verify local requirements, confirm ADA counts, and source material specifications for procurement documents. Document every AHJ confirmation — email replies and permit copies belong in your project file.
- ADA.gov — Topics: Parking: The primary source for accessible-space dimensions, signage requirements, and accessible-route standards. Start here for any ADA question.
- ADA Restriping Brief — ADA.gov: Explains which ADA obligations are triggered by restriping and how to calculate per-facility minimums. Required reading before any repainting project.
- FHWA MUTCD 11th Edition: National color conventions, marking types, and retroreflectivity guidance. Use this to establish baseline specs, then verify local variations with your AHJ.
- MUTCD Part 3 — Markings: The specific chapter covering pavement marking colors, line widths, and accessible-space marking conventions.
- Iowa DOT DS-23069 Specifications: A strong example of state-level performance specs for multi-component markings, including WFT and retroreflectivity minimums. Useful as a procurement template even outside Iowa.
- Louisiana DOTD Pavement Marking Manual: Detailed guidance on bead application technique and QA procedures for retroreflectivity. Reference this when writing bead-drop specs into contracts.
- WBDG Painted Pavement Markings Guidance: Material selection guidance covering waterborne acrylic, thermoplastic, epoxy, and MMA systems with application and environmental requirements.
- NY OGS Waterborne Traffic Paint Specification: New York State’s specification for waterborne traffic paint, including application method and material composition requirements. Useful for NY-based procurement.
- Caltrans Waterborne Traffic Paint Specification: California DOT’s ready-mixed waterborne acrylic spec — a well-structured template for writing material requirements into bid documents.
- City of Chattanooga Parking Lot Standards: A clear example of how a municipality layers local color and marking requirements on top of MUTCD. Useful for understanding what your own AHJ might require.
Recommended
Need this handled at your facility?
Our crews cover commercial properties across New York, New Jersey, and Connecticut.