Mold Remediation Commercial: What Property Managers Must Do
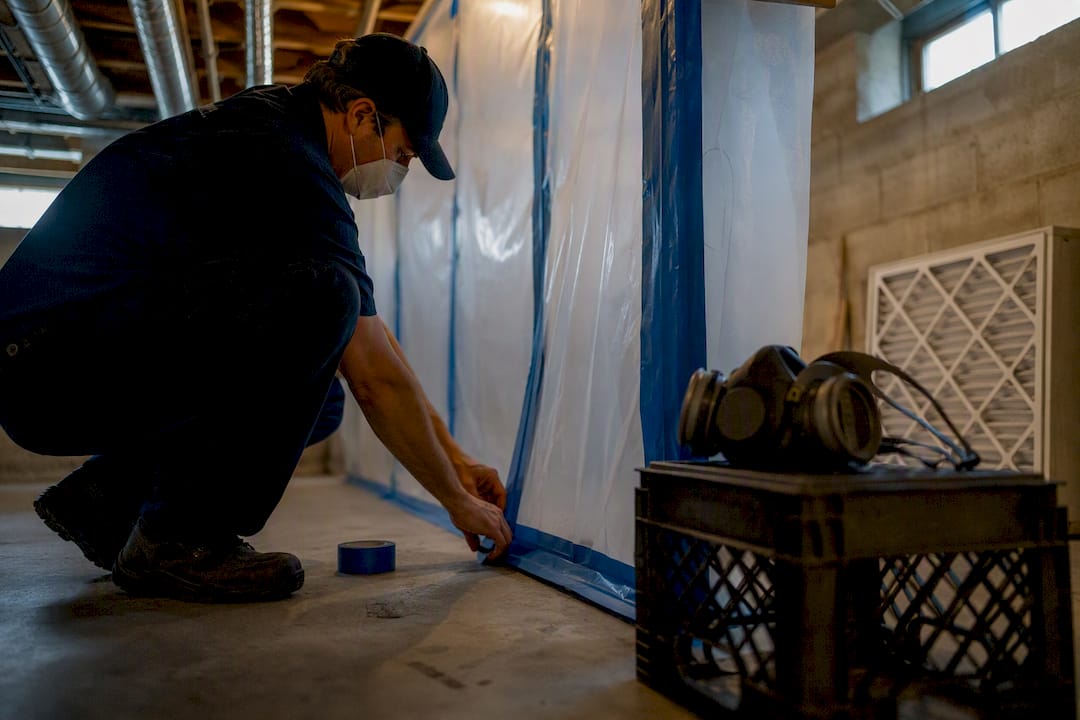
The moment you suspect mold in a commercial building, restrict occupant access to the area, notify facility stakeholders, and stop the water source feeding it within 24 to 48 hours, if at all possible. Assess the affected square footage and material types, since porous surfaces often require removal while non-porous ones can be cleaned. If visible growth is extensive, the HVAC system is involved, or occupants report symptoms, bring in a professional remediation manager rather than handling it internally.
TL;DR:
- Address mold issues within 48 hours to prevent extensive contamination, structural damage, and costly building closure or delays.
- Visual inspection, moisture mapping, and occupant symptom reports are the primary tools; lab testing is rarely necessary unless for legal or medical reasons.
- Containment strategies depend on square footage, HVAC involvement, and contamination spread, requiring physical barriers, negative air pressure, and PPE protocols.
- Porous materials with mold should be removed, while non-porous surfaces can often be cleaned with HEPA vacuuming and detergent; biocides do not replace physical removal.
- Using a single vendor for the entire process enables faster response, better documentation, and reduces delays often caused by multiple contractors.
Table of Contents
- Why Mold Remediation Commercial Response Windows Matter So Much
- What Does a Mold Inspection Checklist Look Like for Commercial Buildings?
- How Should You Inspect and Test for Mold Before Remediation?
- How Do You Contain a Mold Remediation Job in a Commercial Building?
- What’s the Right Way to Clean Porous vs. Non-Porous Materials?
- Does Mold in HVAC Systems Change the Remediation Approach?
- How Do You Know Commercial Mold Remediation Is Actually Complete?
- Should You Handle Mold Remediation In-House or Hire a Professional?
- Nationwide Maintenance’s Track Record With Commercial Recovery
- The Case for Fewer Vendors, Not More Paperwork
- Get Commercial Mold Remediation Support From Nationwide Maintenance
- Where This Guidance Comes From
- Sources
Why Mold Remediation Commercial Response Windows Matter So Much
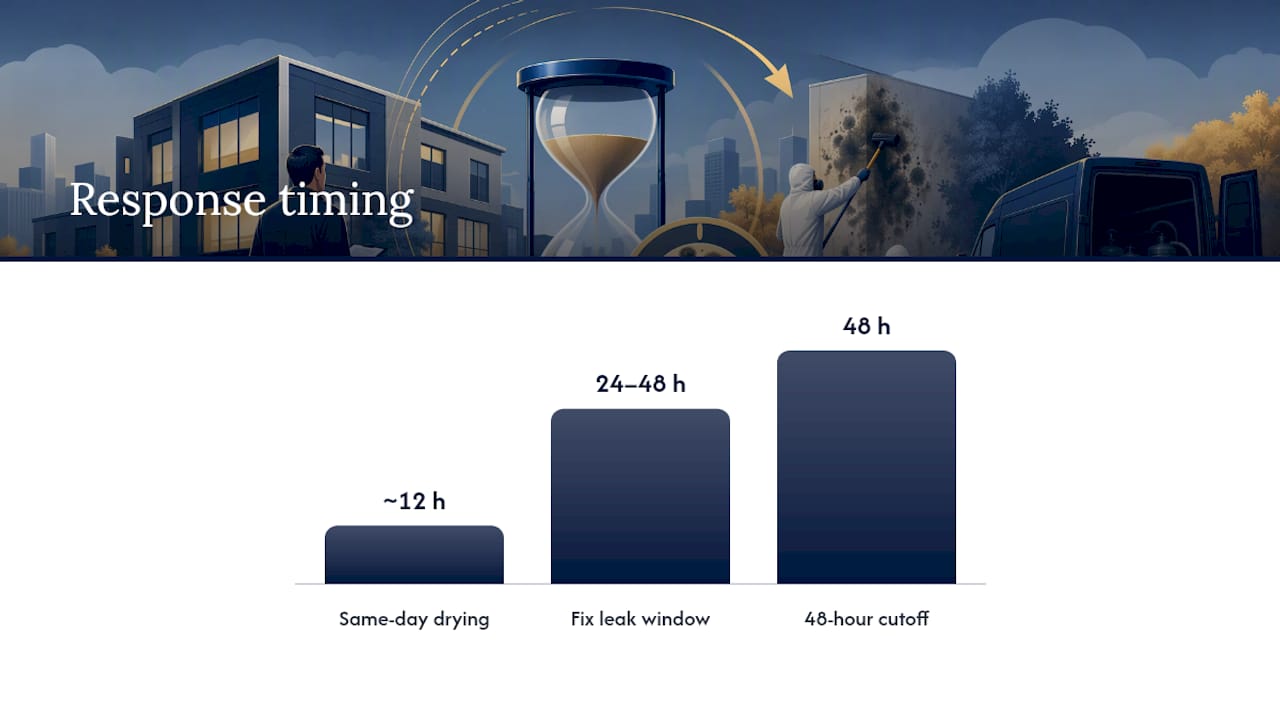
Mold doesn’t wait for your maintenance schedule. According to the EPA’s remediation guidance, mold can begin colonizing building materials within 48 to 72 hours of moisture exposure. That’s the gap between a quick drying job and a full-blown commercial mold removal project involving demolition, containment, and weeks of lost square footage.
The 48-hour window is the entire game. A roof leak discovered on a Friday and ignored until Monday has already crossed into active colonization territory by the time anyone calls a contractor. Every day past that window multiplies the material that needs to come out rather than get wiped down.
The operational fallout goes well beyond the cleanup bill. Commercial mold removal can force partial or full closures, trigger insurance claims that take months to settle, and strain tenant relationships when a retail space or office suite sits dark during peak season. For multi-tenant buildings, one unit’s moisture problem becomes every neighboring unit’s liability question.
Health risk is the other half of the urgency case, and it’s not abstract. NIOSH links damp indoor environments to both respiratory symptoms (coughing, wheezing, asthma flare-ups) and non-respiratory complaints like headaches and fatigue among building occupants. When multiple people in the same wing start reporting similar symptoms, that pattern often signals hidden moisture before any visible mold appears, according to NIOSH’s building dampness research. Sick Building Syndrome complaints clustering around one HVAC zone or floor should escalate your response immediately, not wait for a scheduled walk-through.
What Does a Mold Inspection Checklist Look Like for Commercial Buildings?
A first-discovery walk-through doesn’t require lab equipment. It requires knowing where to look and how to triage what you find.
Start with the obvious indicators, then work toward the ones people miss:
- Visible growth on walls, ceiling tiles, or around window frames, especially fuzzy or discolored patches
- Water stains or tide lines on drywall, drop ceilings, or baseboards
- Peeling paint, bubbling wallpaper, or warped flooring near plumbing lines or exterior walls
- Persistent musty odor in a room or hallway, even without visible growth
- Occupant complaints clustered in one area, particularly respiratory symptoms
- Recent or ongoing leaks, roof penetrations, or HVAC condensation issues nearby
Once you’ve spotted something, material type decides what happens next. Porous materials, drywall, carpet, ceiling tiles, insulation, absorb moisture and mold spores in ways that make thorough cleaning nearly impossible once colonization sets in. Non-porous materials, metal, glass, hard plastic, sealed concrete, usually clean up fine with the right technique. That single distinction determines whether you’re looking at a repair job or a demolition job.
Square footage matters too, but don’t just measure the visible patch. Mold loves to hide behind baseboards, above drop ceiling tiles, and under carpet padding where a leak has been wicking moisture sideways for weeks. A 3 square foot stain on a wall can mean 30 square feet of saturated insulation behind it.
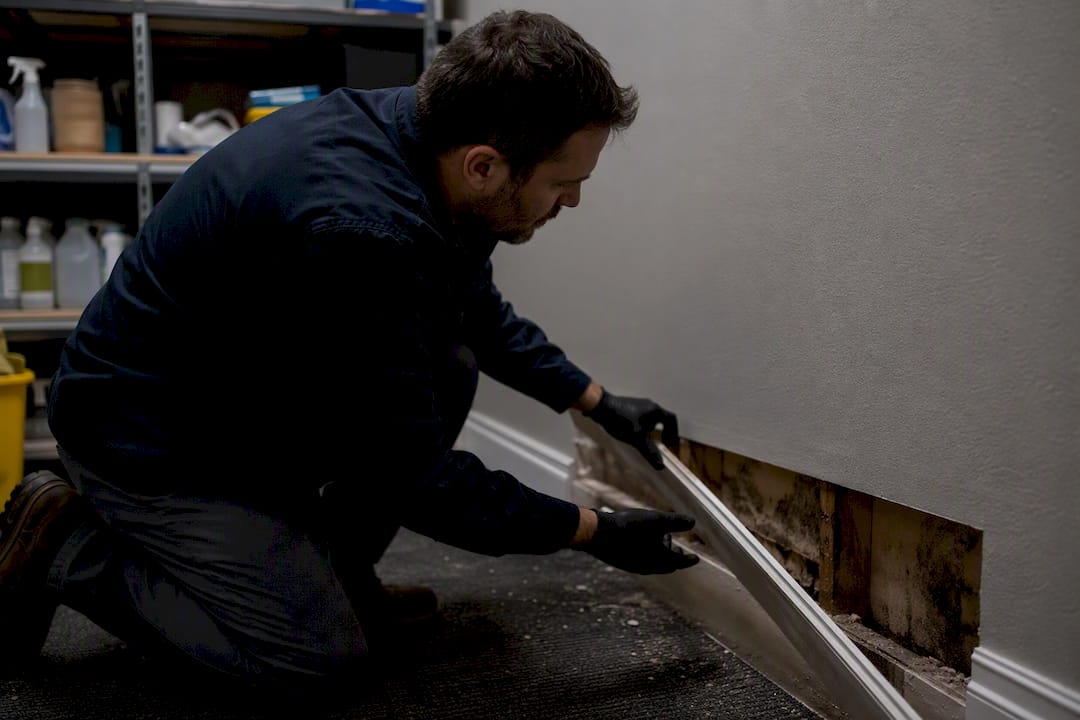
Pro Tip: Pull one baseboard section near any water stain before you estimate scope. What’s hiding behind drywall almost always exceeds what you can see on its face, sometimes by a factor of five or more.
How Should You Inspect and Test for Mold Before Remediation?
Skip the instinct to order air quality testing first. Government guidance treats visual inspection and moisture mapping as the starting point, and for good reason: OSHA has confirmed there’s no federal numeric standard for what counts as a hazardous mold concentration in air. Without a benchmark to measure against, a lab report showing “X spores per cubic meter” tells you very little that a trained eye and a moisture meter can’t already establish.
A practical inspection sequence looks like this:
- Document the visible evidence first. Photograph every affected surface, note the size and location, and log the date. This becomes your baseline for insurance claims and for verifying remediation success later.
- Map moisture with a meter, not a guess. Moisture readings on drywall, subfloor, and framing tell you where water has traveled, which is usually farther than the mold has spread visibly.
- Interview occupants near the affected zone. Symptom reports, especially recurring ones, often flag moisture problems before mold becomes visible, an early-warning pattern NIOSH has documented repeatedly.
- Decide whether sampling adds value. Air or surface sampling rarely changes the remediation plan for a routine leak. It becomes worth the cost in specific scenarios: pending litigation, a documented medical claim from an occupant, or contamination that may have spread through HVAC ductwork where visual inspection can’t reach.
- Compile the file. Photos, moisture logs, occupant statements, and any lab results (if ordered) go into one record that supports your insurance claim and protects you if a tenant disputes the scope of work later.
OSHA’s own guidance reinforces this order of operations: preventing moisture and correcting it promptly does more to protect worker health than air sampling ever will. Sampling measures a problem after the fact. Moisture control prevents it. If your inspection process leans too heavily on lab work and too lightly on finding and fixing the leak, you’re solving the wrong problem first.
That said, visible mold and musty odors themselves are the trigger point OSHA recognizes for action, not a spore count. If you can see it or smell it, that’s your green light to move into remediation planning, no confirmatory lab report required.
How Do You Contain a Mold Remediation Job in a Commercial Building?
Containment strategy hinges almost entirely on square footage. The EPA’s area-based guidelines split remediation jobs into tiers, with limited containment appropriate for smaller areas and full containment required once contamination spans a larger footprint or risks spreading through the building’s air handling system. Anything approaching or exceeding 100 square feet should have a designated remediation manager overseeing the job, per that same guidance, someone accountable for the plan from start to finish, not a rotating crew making decisions on the fly.
Containment itself has physical components that a legitimate remediation plan should specify in writing:
- Physical barriers, usually poly sheeting sealed at seams, isolating the work zone from occupied space
- Negative air machines pulling air out of the containment zone and exhausting it outside the building, so spores don’t migrate into clean areas
- Airlocks or decontamination chambers at entry points so workers don’t carry contamination out on clothing or equipment
- Dedicated waste chutes or sealed bagging routes for removing contaminated material without dragging it through occupied hallways
Worker safety runs parallel to containment. PPE requirements scale with the size and type of contamination, ranging from gloves and N95 respirators for small non-porous cleanups to full-face respirators and disposable suits for larger jobs involving porous material removal. HEPA vacuums do the heavy lifting during final cleanup, but the filters themselves become contaminated waste and need to be bagged and disposed of by someone wearing the same PPE used during removal, not casually swapped out over a trash can.
Pro Tip: Ask any remediation contractor to show you their containment diagram before work starts, not describe it. A real plan has measurements, airlock locations, and negative air machine placement on paper. A verbal description usually means there isn’t one.
What’s the Right Way to Clean Porous vs. Non-Porous Materials?
The material determines the method, and getting this wrong is the single most common mistake in commercial mold removal. Porous materials, drywall, carpet, ceiling tiles, fabric-wrapped insulation, absorb mold at a structural level. Once contamination sets in, cleaning agents can’t reach spores embedded in the material’s fibers. EPA guidance is direct on this point: moisture-damaged porous materials that couldn’t be dried within 24 to 48 hours should be removed and replaced, not scrubbed and sealed.
Non-porous and semi-porous surfaces, metal studs, glass, sealed concrete, finished wood, get different treatment entirely. HEPA vacuuming followed by a damp wipe with detergent solution typically handles these surfaces effectively, and repeating that cycle through the final cleaning stage catches residual spores that settled after the bulk removal work.
Here’s the detail that trips up a lot of well-meaning maintenance teams: bleach and other biocides don’t substitute for physical removal. Guidance from the EPA is explicit that dead mold remains allergenic and potentially toxic even after it’s killed in place. Spraying a disinfectant on a moldy ceiling tile and calling it remediated leaves the allergenic material sitting exactly where it was, just no longer alive. The mold still needs to be physically removed or thoroughly cleaned away, not just neutralized.
Disposal practices matter for the same reason. Contaminated porous material gets bagged in sealed plastic before it leaves the containment zone, minimizing spore release into clean hallways or lobbies. For drywall replacement and structural repair after removal, coordinating with a drywall repair specialist keeps the rebuild phase moving without a second vendor search mid-project.
Some non-porous surfaces with lingering odor issues benefit from specialized approaches beyond standard detergent cleaning; enzyme-based cleaning treatments can address organic residue that plain wiping leaves behind.
Does Mold in HVAC Systems Change the Remediation Approach?
Yes, and it changes it significantly. If mold is growing inside ductwork, on coils, or in drip pans, the building’s air handling system becomes a distribution network for spores rather than a contained problem in one room. That single fact raises the containment requirement even for a job that would otherwise qualify as limited.
Watch for these HVAC-specific indicators during your walk-through:
- Musty odor concentrated near supply vents or noticeably stronger when the system cycles on
- Visible growth on visible ductwork, especially near condensation points
- Standing water or persistent dampness in drip pans or condensate lines
- Symptom complaints that track with specific zones served by one air handler rather than the whole building
When any of these show up, bring in an HVAC specialist alongside your remediation manager, not after them. The two need to coordinate on sequencing: sealing registers and dampers to isolate the contaminated zone, running the system on negative pressure relative to clean areas during active removal, and inspecting duct interiors before anyone declares the job finished. Skipping that coordination is how a contained drywall problem turns into a building-wide odor complaint three weeks later when the system redistributes spores that never got addressed.
How Do You Know Commercial Mold Remediation Is Actually Complete?
Completion has three concrete markers, and none of them is “it looks better than it did.” The moisture source has to be fixed, not just dried out temporarily. There should be no visible mold growth remaining on any surface. And the musty odor that usually accompanies contamination needs to be gone entirely, not faint.
Verification means documenting all three, not just eyeballing the room:
- Conduct a post-clean visual inspection of every surface that was part of the original scope, using the same photo documentation method from your initial walk-through for direct comparison.
- Take a final moisture meter reading across affected framing, subfloor, and drywall to confirm the source is dry, not just the surface.
- Log the results alongside your original documentation so the file shows a clear before-and-after for insurance and for any future tenant questions.
- Communicate completion to affected occupants with a plain-language summary of what was found, fixed, and verified, which heads off lingering anxiety about air quality.
Prevention is where most buildings quietly fail after a successful remediation. The EPA’s guidance emphasizes that fixing the moisture source matters as much as removing the contaminated material, and skipping that root-cause repair all but guarantees the problem comes back. Build a maintenance rhythm around it: humidity monitoring in vulnerable zones, scheduled roof and HVAC inspections before seasonal weather shifts, and a firm internal policy that any reported leak gets addressed within 24 to 48 hours rather than added to a maintenance queue.
Pro Tip: Set a standing rule that any water intrusion report triggers same-day drying equipment deployment, even before you know the cause. Chasing the source can wait a day. Drying the material can’t, or you’ve already lost the 48-hour window.
For buildings with a history of leaks, reviewing your water damage response protocol before the next incident, rather than during it, tends to shave real time off the response window.
Should You Handle Mold Remediation In-House or Hire a Professional?
Small, isolated spots on non-porous surfaces, a few square feet on a bathroom tile wall, say, are usually manageable with in-house cleaning staff and standard PPE. Beyond that, the calculus shifts fast.
Bring in a dedicated remediation manager or outside contractor when any of these apply:
- The affected area approaches or exceeds 100 square feet, the EPA’s own threshold for requiring formal oversight
- Porous materials are involved and need removal rather than cleaning
- The HVAC system shows signs of contamination or spore distribution risk
- Occupants include anyone with respiratory conditions, immune sensitivities, or documented symptom complaints
- There’s potential insurance or legal exposure tied to the contamination’s cause or extent
If you’re vetting an outside contractor, ask pointed questions before signing anything. Do they have documented experience with commercial-scale projects, not just residential jobs? Do they carry certifications relevant to mold remediation work, and can they produce proof of liability insurance? Can they provide references from comparable commercial properties, and will they put the remediation plan in writing before work starts rather than describing it verbally?
The contract itself should spell out containment specifications, a disposal plan for contaminated material, documented PPE and worker safety protocols, and a defined post-remediation verification deliverable, meaning you get a written confirmation of completion, not just an invoice. A contractor who resists putting these details in writing is telling you something about how the job will actually run. For remediation partners specializing in mold-specific work, resources like commercial mold removal services outline what a thorough scope of work typically includes.
Nationwide Maintenance’s Track Record With Commercial Recovery
Nationwidemaintenance has spent more than 30 years handling facility maintenance and restoration work for commercial, retail, and industrial clients across the Tri-State area, including emergency water mitigation, drywall repair, HVAC coordination, and full construction and restoration services under one contract. That integrated structure matters most in the exact moment a mold problem surfaces: no gap between the crew that stops the water and the crew that rebuilds the wall.
High-profile clients including Costco and CVS rely on Nationwidemaintenance for consistent, code-compliant facility upkeep, backed by eco-friendly practices and 24/7 emergency response when water intrusion or contamination can’t wait for business hours.
The Case for Fewer Vendors, Not More Paperwork
Every additional vendor in a remediation job adds a handoff, and every handoff adds delay. We’ve watched property managers lose days coordinating between a water mitigation company, a drywall contractor, and an HVAC technician who each need the others to finish before they can start their piece.
A single-contract approach collapses that sequence. One team documents moisture readings, removes contaminated drywall, coordinates the HVAC evaluation, and rebuilds the wall, all under one point of contact and one continuous record. That matters more than it sounds: insurance adjusters want one clean file, not three fragmented ones from vendors who never spoke to each other. Faster documentation means faster claims, and faster claims mean faster reopening.
— Nationwide Maintenance.
Get Commercial Mold Remediation Support From Nationwide Maintenance
Chasing down a water mitigation company, then a drywall crew, then an HVAC technician wastes days you don’t have once mold is already colonizing. Nationwidemaintenance handles the full sequence, emergency drying, contaminated material removal, drywall and construction repair, and post-remediation cleaning, under a single contract, so your team isn’t managing three separate vendor timelines during an active problem.

That single-contract structure is built specifically for property managers juggling multi-location portfolios or high-traffic retail environments where downtime carries a real cost. Instead of vetting a new contractor mid-crisis, you get one team that already knows your building’s history, from prior repairs to recurring trouble spots. Our property management facility services cover emergency response, cleanup, and rebuild phases without the scheduling gaps that come from coordinating separate specialists.
If you’re facing an active moisture problem or want a preventive inspection before the next storm season, reach out to Nationwidemaintenance for an assessment and a written scope of work before conditions get worse.
Where This Guidance Comes From
This article draws on federal guidance and workplace health research that shapes how commercial remediation is regulated and practiced across the United States:
- The EPA’s Mold Remediation in Schools and Commercial Buildings Guide sets the area-based containment framework and remediation manager thresholds referenced throughout this piece.
- OSHA’s Brief Guide to Mold in the Workplace clarifies the absence of a federal numeric exposure standard and the role of visible mold as an action trigger.
- NIOSH’s mold and workplace health resources document the respiratory and non-respiratory symptoms tied to damp indoor environments and support the case for prioritizing occupant reports during inspection.
Sources
- Mold Remediation in Schools and Commercial Buildings Guide: Chapter 3 | US EPA
- SHIB 03-10-10 A Brief Guide to Mold in the Workplace - OSHA
- Mold in the Workplace | Mold | CDC/NIOSH
Recommended
Need this handled at your facility?
Our crews cover commercial properties across New York, New Jersey, and Connecticut.