Asphalt Crack Repair: The Right Fix for Every Crack Type
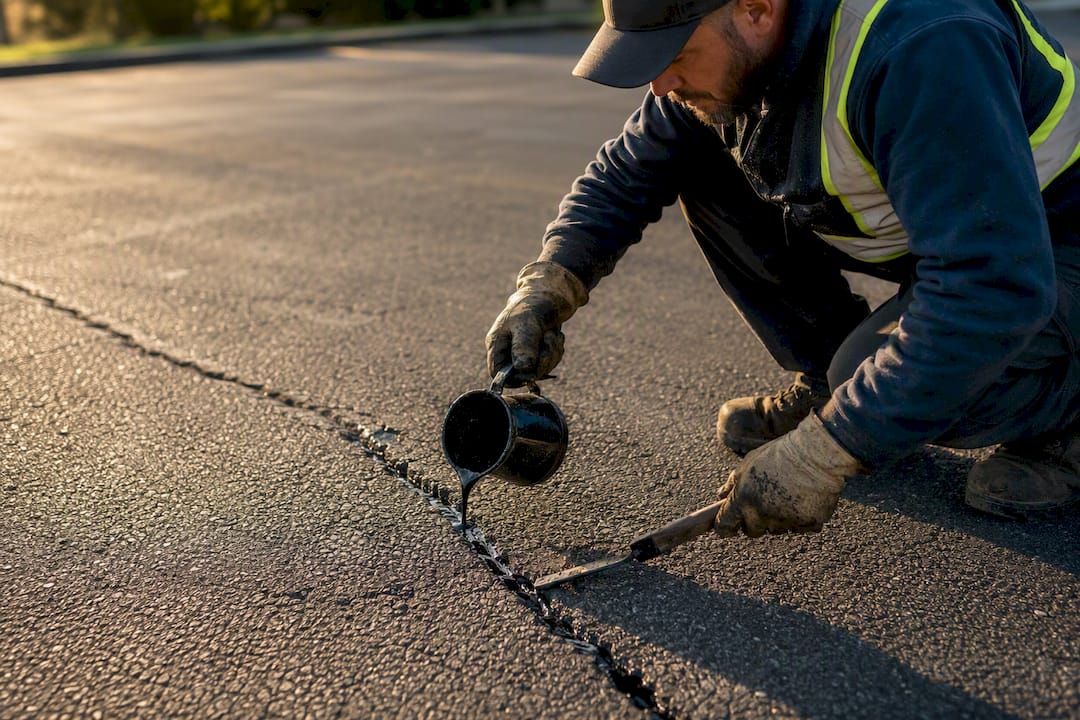
For most driveways, the fix is simple: use a cold-pour filler for cracks up to ½ inch wide, route and seal with hot rubber for wider or “working” cracks that shift with the seasons, and call a contractor if you’re seeing alligator patterns or the base underneath is failing. Preparation decides whether any of these hold up. A crack that’s clean and bone dry before you apply anything will outlast a sloppy job with premium sealant every time.
Call a professional when you notice:
- Cracking spread across more than a small section of the driveway
- The same crack reopening after two DIY attempts
- Cracks wider than 1 inch or any sign of the base heaving or sinking
Preventive crack treatment pays for itself. Left alone, cracks let water into the base layer, and that’s what turns a $20 tube of filler into a full-blown pothole within a couple of freeze-thaw cycles, according to pavement research reviewed by the National Research Council of Canada.
Key Takeaways
Asphalt crack repair works best when preparation and material choice match the crack’s width and movement, not just its appearance.
| Point | Details |
|---|---|
| Match material to width | Cold-pour for cracks up to ½ inch, hot-pour rout-and-seal for wider or working cracks. |
| Cleaning decides longevity | Dry, debris-free cracks outlast expensive sealant applied over dirt or moisture. |
| Time it for fall | Late summer to early fall lets material cure before freeze-thaw cycles begin. |
| Watch for base failure | Alligator cracking or repeated DIY failure signals a subbase problem, not a sealant problem. |
| Bring in help when needed | Nationwide Maintenance handles diagnosis and repair when a driveway’s issue goes past a DIY fix. |
Table of Contents
- Pre-Repair Checklist: What to Check Before You Buy Anything
- What Type of Crack Are You Actually Looking At?
- Which Material to Choose: Cold-Pour, Hot-Pour, or Emulsion
- Step-By-Step: Fixing Small Cracks Up to ½ Inch
- Step-By-Step: Routing and Sealing Wider or Working Cracks
- When and How Long: Timing Your Repair Right
- What Most DIY Guides Get Backwards
- Nationwide Maintenance Handles What DIY Can’t
- Sources
Pre-Repair Checklist: What to Check Before You Buy Anything
Grab a tape measure before you grab a caulk gun. Walk the driveway and jot down what you’re actually dealing with, because the size and pattern of the cracking tells you which product aisle to shop in.
- Measure every crack’s width and length. Note whether cracks are branching into a web pattern, which usually signals a bigger problem underneath.
- Check the forecast. You need dry pavement and a stretch of mild weather. Cold-pour products need the surface temperature above roughly 50°F to cure at a normal pace.
- Look for crumbling edges. Soft, crumbly crack edges often mean the asphalt has already started to break down, not just crack.
- Gather your tools. You’ll want a stiff wire brush, a broom or shop vacuum, a crack cleaner or can of compressed air, cold-pour bottles or caulk-gun cartridges, a putty knife, and gloves plus eye protection.
Skipping this step is how homeowners end up back at the hardware store for a second trip.
What Type of Crack Are You Actually Looking At?
Not all cracks behave the same way, and lumping them together is the most common mistake in DIY asphalt crack repair. Here’s how to read what you’re looking at:
- Hairline cracks are thin, surface-level lines, usually under ⅛ inch. They’re cosmetic for now but worth sealing before they widen.
- Transverse cracks run across the driveway, often from thermal contraction. These tend to be “working” cracks that move with temperature.
- Longitudinal cracks run parallel to the direction of traffic or paving seams. Depending on width, treat these like transverse cracks.
- Edge cracks form along the border of the driveway, often from poor drainage or lack of support at the edge.
- Alligator cracking looks like a web of interconnected lines, resembling reptile skin. This is a structural failure signal, not a surface crack.
The working-versus-non-working distinction matters more than most homeowner guides admit. A non-working crack stays roughly the same width year-round and can usually be filled. A working crack opens and closes with temperature swings, and filling it with a rigid material just guarantees it cracks again next winter. Caltrans defines a working crack as one that moves at least ¼ inch annually, while other agency guidance uses a tighter ⅛-inch threshold. For a homeowner without lab equipment, the practical test is simpler: if the crack noticeably changes width between a cold morning and a hot afternoon, treat it as working and seal it, don’t just fill it. Alligator cracking or any crack wider than an inch with visible sinking nearby means the base has failed, and no surface product fixes that.
Which Material to Choose: Cold-Pour, Hot-Pour, or Emulsion
The material aisle at any hardware store can be confusing, but the decision tree is actually short once you know your crack width and how much effort you want to put in.
- Cold-pour squeeze bottles and caulk-gun cartridges are the right call for cracks up to ½ inch. No heating equipment, no special training. Expect 1 to 3 years of service life before you’re back out there with another bottle.
- Hot-pour rubberized sealant is the durable option for wider or working cracks. It requires a melter or applicator (or a contractor with one) but delivers 3 to 7-plus years of service, and Caltrans field data shows hot rubber and fiber-modified fillers reaching 6 to 8 years when properly routed and installed.
- Emulsions cost less than hot rubber but need blotter sand applied on top before you can drive on them, since emulsions require a sand coating before trafficking while hot rubber typically doesn’t.
- Crack tape works as a fast, temporary patch for hairline cracks, but it’s not a long-term fix on a driveway that sees regular sun and traffic.
On cost, DIY cold-pour work runs a few dollars per linear foot in material. Hiring a contractor for hot-pour rout-and-seal work typically costs more upfront per foot, but the extended lifespan often makes it the better value on wider or working cracks, where a cold-pour patch would need redoing every season anyway.
Step-By-Step: Fixing Small Cracks Up to ½ Inch
This is the repair most homeowners will do themselves, and it doesn’t take a full weekend.
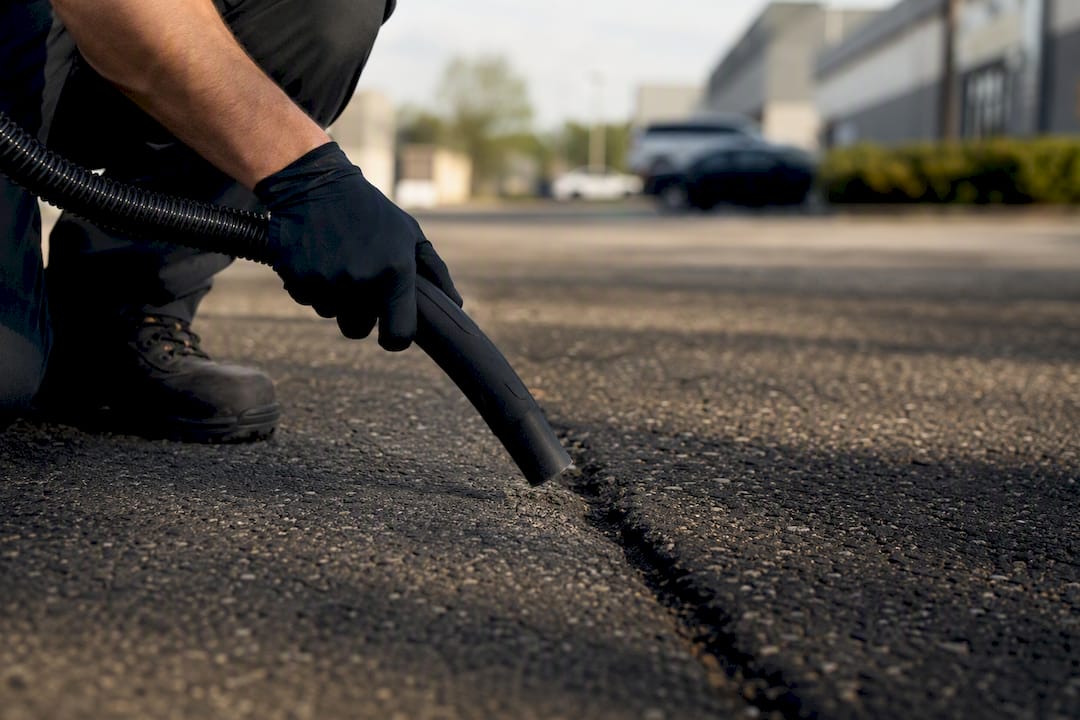
- Clear the crack. Pull any weeds or grass growing in it, then knock loose debris free with a wire brush.
- Blow it out. Use compressed air or a shop vacuum to remove dust and grit. Skipping this step is the number one reason cold-pour fillers fail early, since cleaning and drying the crack is the single biggest factor in how long a repair lasts.
- Let it dry fully. Even a damp crack will trap moisture under the sealant and cause it to lift.
- Apply in short sections. Work 3 to 4 feet at a time rather than trying to run the whole bottle down a 20-foot crack in one pass.
- Overfill slightly, then tool it flush. Use a putty knife to press the filler down and feather the edges level with the surrounding pavement.
- Remove excess immediately. Wipe away anything that squeezes out onto the good asphalt before it sets.
- Respect cure time. Most cold-pour products are walkable within a few hours but need a full day or more before you park a car on them.
Pro Tip: Cut the nozzle tip at an angle instead of straight across. It gives you better control pushing filler down into narrow cracks instead of just smearing it across the top.
If you’re prepping for a full driveway refresh, this is also the moment to plan ahead for sealcoating the whole surface once your patches have cured.
Step-By-Step: Routing and Sealing Wider or Working Cracks
Hot-pour work is a bigger commitment, and it’s fair to decide here that this is where you hire it out. If you’re set on doing it yourself, here’s the sequence:
- Rout the crack first. A router creates a clean reservoir, and best practice keeps the width-to-depth ratio close to 1:1, roughly a ¾-inch-wide cut by ¾-inch deep.
- Clean with a hot air lance or compressed air. This step matters even more than with cold-pour, since routing and thorough cleaning are what let hot sealant actually bond to the crack walls instead of just sitting on top.
- Watch your melter temperature. Hot-pour rubber needs strict temperature control and constant agitation. Overheating it degrades the material before it ever goes in the crack.
- Pour and finish flush. Avoid “overbanding” the sealant more than about ½ inch wider than the crack itself, since a wide, raised bead catches tires and looks sloppy.
- Compact if you’re patching an adjacent area. A plate compactor or hand tamper improves long-term bonding significantly more than just leaving loose material to settle under traffic.
Pro Tip: Rent a hot air lance from a tool rental counter rather than buying a melter outright, unless you’ve got more than one driveway’s worth of cracking to handle this season.
When and How Long: Timing Your Repair Right
The best window for crack repair is late summer through early fall, when cracks sit near their mid-point width and the material has time to cure before winter freeze-thaw cycles start working against it. Agency guidance recommends applying treatments when cracks are at that midpoint opening rather than in peak summer heat, when the crack is at its narrowest.
- Cold-pour emulsions cure best above roughly 50°F and need blotter sand before you drive on them.
- Hot-pour rubber sets faster once cooled but demands tight temperature control during application.
- Plan a full sealcoat every 2 to 4 years depending on how much traffic the driveway sees, and always let crack repairs cure fully before sealcoating over them.
Tools, Safety, and Compaction That Actually Extend Repair Life
Homeowners can handle wire brushes, shop vacs, caulk guns, and cold-pour cartridges without any specialty gear. Hot air lances and melters are worth renting rather than buying for a one-time job.
- Compaction, even a simple hand tamper or the old “drive over it slowly” trick, meaningfully improves how long a patch holds, since FHWA field studies found compaction and material quality are the biggest drivers of patch longevity.
- Wear gloves and eye protection any time you’re near hot-pour equipment, and never leave a melter unattended.
- The most common mistake is applying sealant to a damp or dirty crack, which guarantees an early failure no matter how good the product is.
Pro Tip: If you only fix one thing about your process, fix the cleaning step. It costs nothing and it’s what separates a repair that lasts years from one that peels up by spring.
When to Call In a Contractor Instead
Nationwide Maintenance has spent over 30 years diagnosing pavement failures across commercial and residential properties, and the pattern is consistent: DIY works fine until the base itself is compromised.
- Alligator cracking across a section of pavement, not just isolated lines
- Repeated failure of the same crack after two DIY repair attempts
- Large areas needing patching, or drainage problems feeding water under the slab
A quality contractor performing a repair estimate should document the affected area with photos, note compaction and base condition, and give you a clear scope before starting work.
A driveway that keeps recracking in the same spot almost never has a sealant problem. It has a base problem, and no amount of filler fixes what’s happening six inches below the surface.
What Most DIY Guides Get Backwards
Most articles on this topic spend their word count arguing over which sealant brand cures fastest. That’s the wrong fight. The research consistently points to preparation, not product, as the variable that decides whether a repair lasts one season or seven. A $6 tube of cold-pour filler applied to a clean, dry crack will outperform a premium hot-pour job rushed over damp asphalt.
The second thing conventional advice glosses over is the working-crack distinction. Plenty of guides tell homeowners to “fill the crack” without asking whether it’s moving with the seasons. Fill a working crack with a rigid product and you’re just buying yourself a repeat job next year.
What should a homeowner actually prioritize? Spend your effort on the blow-out and dry-down, not on hunting for the fanciest sealant on the shelf. And be honest with yourself about scale: a few isolated hairline cracks are a Saturday project. A driveway covered in interconnected alligator cracking is a subbase conversation, and that conversation belongs with someone who’s diagnosed hundreds of them.
— Nationwide Maintenance.
Nationwide Maintenance Handles What DIY Can’t
When a driveway or parking lot has moved past crack sealant into alligator cracking, drainage failure, or repeat breakdowns, Nationwide Maintenance brings 30-plus years of pavement diagnosis to the job, plus the ability to handle the sealcoating and ongoing upkeep afterward under one contract instead of juggling separate vendors.

That matters for property managers and business owners managing pavement across multiple locations, where a patchwork of one-off repairs costs more in the long run than a single maintenance relationship. Nationwide Maintenance’s facility maintenance services for property managers cover everything from initial diagnosis to long-term care, so the same team that fixes the base issue is the one keeping the lot in shape for years after. If your pavement problem has outgrown a caulk gun, request an estimate from Nationwide Maintenance and get a professional read on what’s actually happening beneath the surface.
Sources
- CHAPTER 4 CRACK SEALING, CRACK FILLING, AND JOINT SEALING (Caltrans / FPMetag)
- The Best Practices of Crack Sealing — AsphaltPro
- Materials and Procedures for Repair of Potholes in Asphalt-Surfaced Pavements: Manual of Practice (Updated) — FHWA
- Crack treatment best practices (Canadian review) — NRC Publications
Recommended
Need this handled at your facility?
Our crews cover commercial properties across New York, New Jersey, and Connecticut.